Set up post content
This explains how to set post content on the "Create a post" screen.
Content that can be posted varies by social profile. For details, see Postable Content.
Check Post Preview (Browser version only)
On the right side of the "Create a post" screen, post previews for "Smartphone" and "Desktop" are displayed.
Clicking the "Smartphone icon" and "Desktop icon" in the upper right corner of the screen allows you to switch between and check their respective previews.
About X Media Post Previews
On X (Twitter), complex areas may be selected as thumbnails due to image recognition. Since SocialDog mechanically crops the center, the thumbnail display may differ from the actual post screen.
Select Destination Social Profile
- Selecting a social profile at the top allows you to choose the destination social profile.
Simultaneously Post to Multiple Social Profiles
- You can select multiple destination social profiles.
- Only one X (Twitter) account can be selected. This is because X (Twitter) rules prohibit posting identical content to multiple accounts.
- When multiple social profiles are selected, the "Common" tab will appear.
- You can enter post content common to all accounts in the "Common" tab.
- The input content in "Common" will be reflected in all accounts.
- To change the post content for each account
- Click on each account's tab to change the post content.
- If you change the content in an account's tab, the content of the "Common" tab will no longer be reflected, and a red ● icon will appear in the upper right corner of the account's icon.
- Clicking "Restore common content" will revert the state to reflect the content of the "Common" tab.
If there is an error in the post content
If there is an error in the text, image, or video content, a warning icon will appear on the social profile tab.
You cannot Post with errors. You can Add to Drafts regardless of whether there are errors.
Attach Media such as Images or Videos
You can attach and Post media such as images or videos. Media can be attached using the following methods:
- Click the "Image icon"
- Drag and drop images into the form
- Paste images while the form is open, after copying them to the clipboard
- For information on the media formats that can be attached, please refer to Postable Content.
- If multiple images are attached, they will be Posted in the order they were Added.
- You can Change the posting order by dragging and dropping images.
Edit Images (PC browser version only)
Simple image Edit is possible.
Resize Images
- Click [Edit] on the uploaded image.
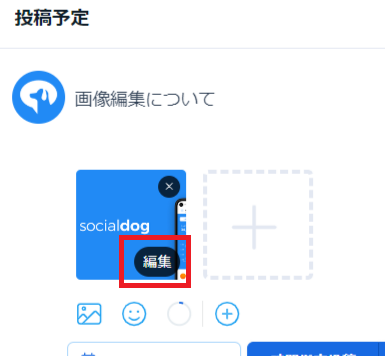
- Select the target size you want to crop from the left side of the screen, adjust it, then click [Save] in the upper right corner of the screen.
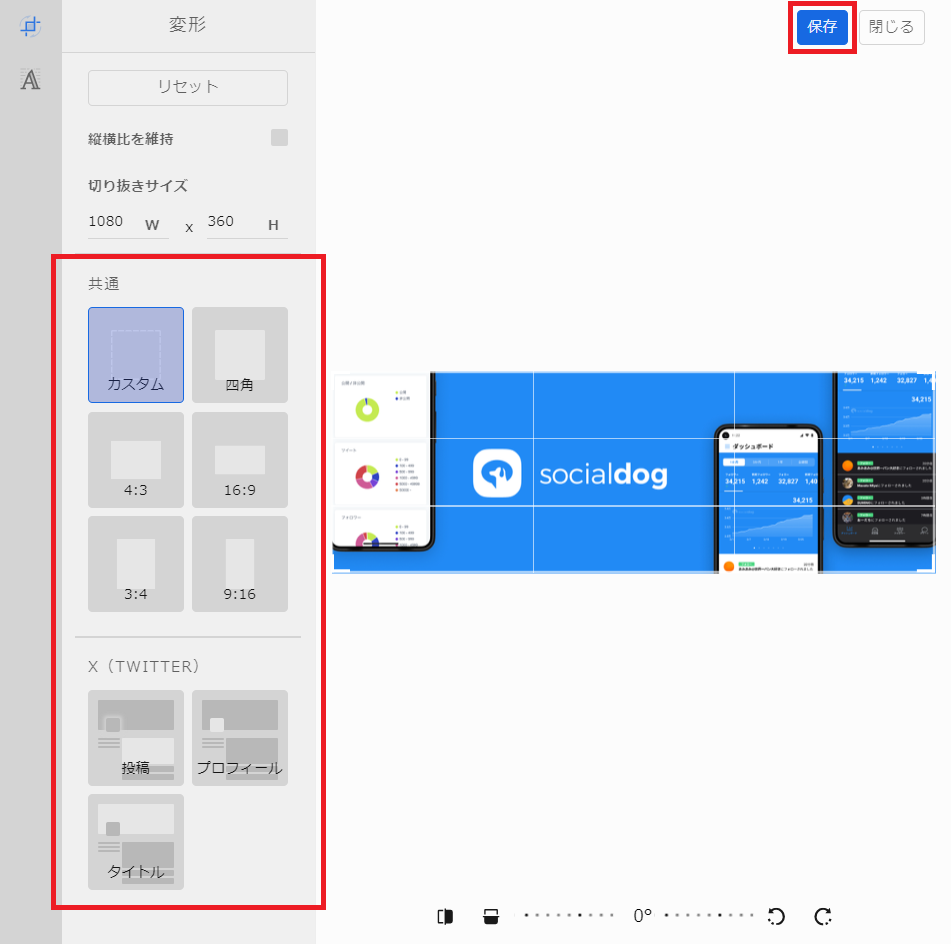
Add Text to Images
- Click [Edit] on the uploaded image.
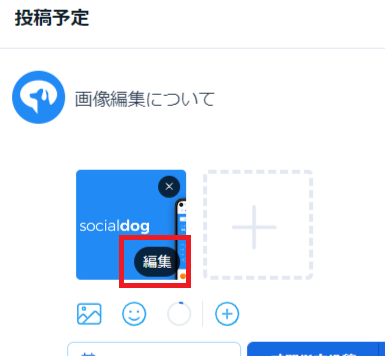
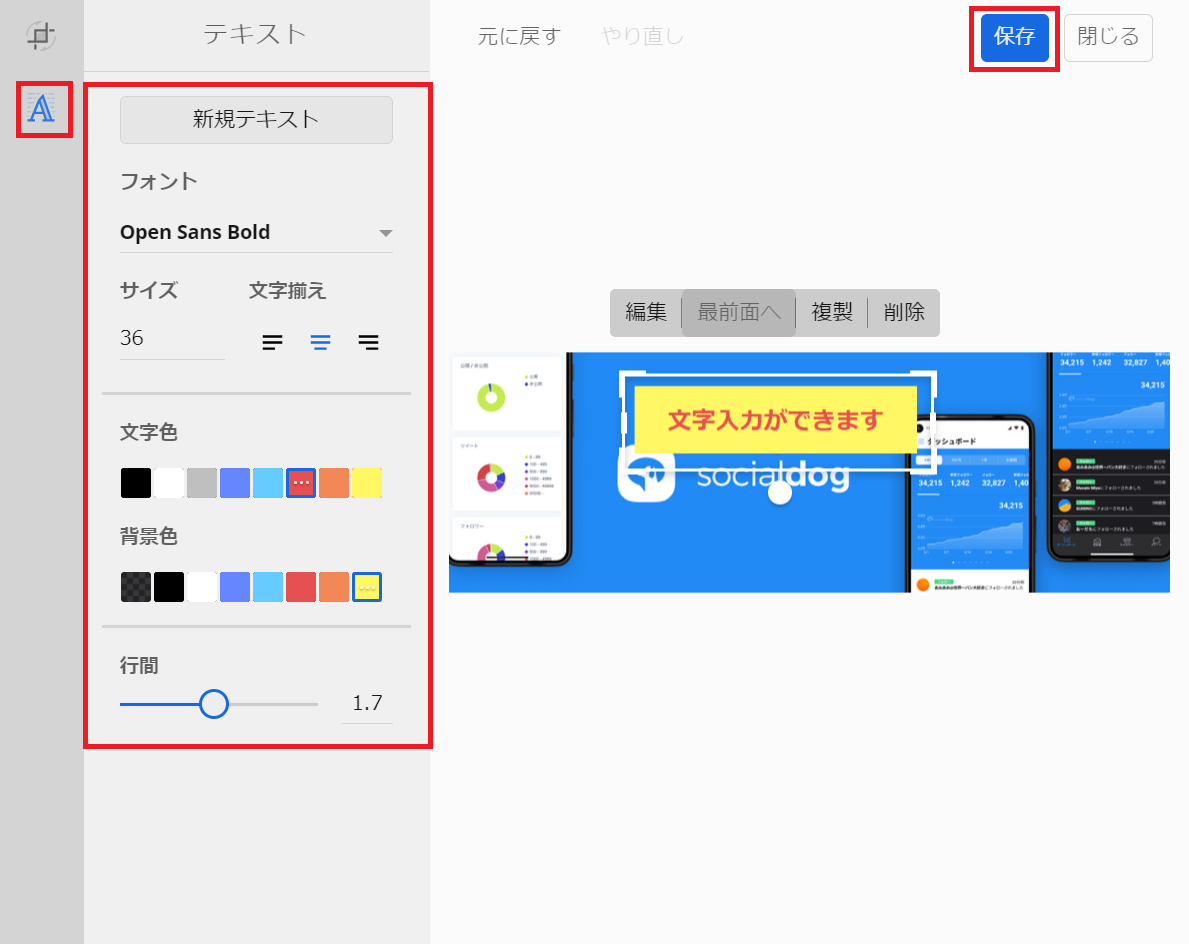
- Click [A] on the left side of the screen to switch to the text input screen.
- Select font, size, alignment, text color, background color, and line spacing, arrange them, then click "Save".
Create a Thread (X (Twitter), Threads)
You can connect multiple Posts in a thread format and schedule them, especially when you want to divide a Post or when the content exceeds character limits.
- Click [Add Destination] or [+] to Add an X (Twitter) account or Instagram account as a destination.
- Click [+] in the lower right of the text input field.
- You can Post multiple Posts in a thread format, but you cannot Change the Post time for each thread.
- Threads cannot be created in the common tab of the Create a post screen. Please create them from the X (Twitter) or Threads account tab.
Limitations per Plan
- Number of scheduled posts in thread format that can be set simultaneously
- Free Plan: Up to 1 per social profile
- Other Plans: Unlimited
- Number of threads that can be Added to a single scheduled post
- Maximum 50
Add a Poll (X (Twitter))
- Click [Add Destination] or [+] to Add an X (Twitter) account as a destination.
- Click the [Poll] button.

- Enter answers (options) enclosed in quotation marks. You can enter 2 to 4 answers.
- Set the poll duration. You can set it from 5 minutes to 7 days. Poll acceptance begins from the time it is Posted on X (Twitter).
- You cannot include Media in a poll.
- Poll results cannot be checked on SocialDog.
Set Accounts That Can Reply (X (Twitter))
- Click [Add Destination] or [+] to Add an X (Twitter) account as a destination.
- Click the [Accounts that can Reply] (globe icon) button.

- Select the accounts that can Reply to your Post from the following:
- Everyone
- Accounts you are Following
- Verified Accounts
- Only accounts you @Post
Set Alt Text (ALT) for Images (X (Twitter))
This feature is scheduled for future release. Please refer to the product roadmap for the release date.
- Click [Add Destination] or [+] to Add an X (Twitter) account as a destination.
- Drag and drop the image you want to upload, or click [Media (image icon)] to select the image.
- Click [Alt Text (ALT icon)].
- Enter a description for the image.
- Click [Save].
Schedule Feed, Reels, and Stories Posts (Instagram)
On SocialDog, you can Post to Instagram Feed, Reels, and Stories.
- Click [Add Destination] to Add one Instagram account as a destination.
- Select [Post] or [Stories]. For Reels, select "Post" and Post a single video.
- Attach an image or video. For Stories, you can Post one Media (image or video).
- For information on image and video formats that can be Posted to Stories, please check Postable Content.
- If you Post Media with an aspect ratio different from the recommended (9:16), margins may be Added or parts may be cropped on Instagram.
Set Reel Covers (Instagram)
You can set a scene from within the video or any image as the cover image for Instagram Reels.
- Click [Add Destination] or [+] to Add an Instagram account as a destination.
- Drag and drop the Reel video, or click [Media (image icon)] to select the video.
- Click [Edit Cover] displayed on the thumbnail of the uploaded video.
- Move the seek bar to select the scene you want to set as the cover.
- If you want to set an arbitrary image as the cover, click [Set another image] to upload the image.
- Click [Save].
Set Music (Instagram)
You can set music for Instagram Reel Posts (videos).
- Click [Add Destination] or [+] to Add an Instagram account as a destination.
- Drag and drop the video you want to upload, or click [Media (image icon)] to select the image.
- Click [Set Music for Reel Video (music note icon)].
- Enter a song title to search, or find the desired song from the list of trending songs.
- You can preview the song by clicking [Play Music (play icon)].
- Click [Select] to the right of the song title you want to set.
- The music's start position cannot be set. Music will play from 0 seconds.
- If you set music for a video with audio, both the video's audio and the music will play.
Tag People (Instagram)
You can tag people in Instagram Feed Posts (images) or Reel Posts (videos).
- Click [Add Destination] or [+] to Add an Instagram account as a destination.
- Drag and drop the image you want to upload, or click the [Media (image icon)] button to select the image.
- Click the [Tag People / Collaborator (person icon)] button.

- Click the location in the image where you want to tag.
- Enter the username you want to tag. On SocialDog, you cannot search for and Add a username you want to tag.
- Click the [Add Tag] button. You can check if the Account name is correct by clicking the [View on Instagram (screen transition icon)] button. Up to 20 tags can be Added.
- Click [Save].
In Feed Posts containing multiple Media, you cannot tag videos.
Set Collaborators (Collaborative Post) (Instagram)
You can invite other accounts as collaborators to Instagram Feed or Reel Posts. When the invited party approves the request on Instagram, it will be displayed to their Followers as a collaborative Post.
- Click [Add Destination] or [+] to Add an Instagram account as a destination.
- Drag and drop the image or video you want to upload, or click the [Media (image icon)] button to select it.
- Click the [Tag People / Collaborator (person icon)] button.
- Enter the username of the Account you want to invite as a collaborator, and click [Add].
- Click [Save].
Due to Instagram API limitations, the settings for collaborators differ slightly from the official Instagram app.
- In Feed Posts with a single image, collaborators are also Added as people tags and displayed in the center of the image. When Posting from SocialDog, the display position of people tags cannot be specified.
- In Feed Posts with multiple images or videos, collaborators are not Added as people tags and are not displayed on the image when Posting from SocialDog.
Set Permissions for Users (TikTok)
You can set what users who view your Post can do.
- Click [Add Destination] or [+] to Add a TikTok account as a destination.
- Click [Permissions for Users].
- Check the following items you want to allow for the Post:
- Comments
- Duets
- Remixes
Set Content Disclosure Settings (TikTok)
You can set whether your Post contains commercial or advertising content.
- Click [Add Destination] or [+] to Add a TikTok account as a destination.
- Click [Content Disclosure Settings].
- Turn on [Disclose content information].
- Check the applicable items below according to the Post content:
- Your brand
- Brand content
Set Post Tags for Analytics
By setting tags for Analytics to your Post, you can compare and analyze performance by tag on the Post performance screen after Posting.
Post tags can also be set from the Post performance screen. For information on how to set them and analyze performance by tag, please refer to Analyze Posts (Post performance).
- Post tags are only used for Analytics within SocialDog and are not Posted to social profiles.
- Post tags cannot be set in the following cases:
- Using the Free Plan.
- No social profile linked that supports Post performance.
For more details on supported social profiles and Plans, please refer to Analyze Posts (Post performance).
Create Post Tags
Users who are team administrators and whose Role for the social profile is "Admin" or "Editor" can create Post tags.
- Create a post, or open the Post you want to Edit from [Scheduled posts] or [Drafts].
- Click the [Tag icon (Post tag)] to the left of the Post date and time settings button on the Create a post screen.
- When the drop-down menu appears, click [+Create new tag].
- Enter the tag name in the text field within the dialog, and click [Create].
- The created tag will be automatically linked to the corresponding Post.
Edit Post Tags
Team administrators can Edit the names of Post tags.
- Create a post, or open the Post you want to Edit from [Scheduled posts] or [Drafts].
- Click the [Tag icon (Post tag)] to the left of the Post date and time settings button.
- Click the pencil icon to the right of the tag you want to Edit.
- Change the tag name in the text field within the dialog, and click [Save].
Delete Post Tags
Users who are team administrators and whose Role for the social profile is "Admin" or "Editor" can Delete Post tags.
- Create a post, or open the Post you want to Edit from [Scheduled posts] or [Drafts].
- Click the [Tag icon (Post tag)] to the left of the Post date and time settings button.
- Click the pencil icon to the right of the tag you want to Delete.
- Click [Delete] in the dialog, then click [Delete] in the confirmation dialog.
Link Tags to Posts
Users who are team administrators or general users and whose Role for the social profile is "Admin" or "Editor" can link tags to Posts.
- Create a post, or open the Post you want to Edit from [Scheduled posts] or [Drafts].
- Click the [Tag icon (Post tag)] to the left of the Post date and time settings button.
- Checking the checkbox next to a tag in the tag list displayed in the drop-down menu will link the tag to the Post.
Unchecking the checkbox will unlink it.