Creating a CSV file for bulk import in Excel
This section explains how to create CSV files for bulk import using spreadsheet applications like Excel.
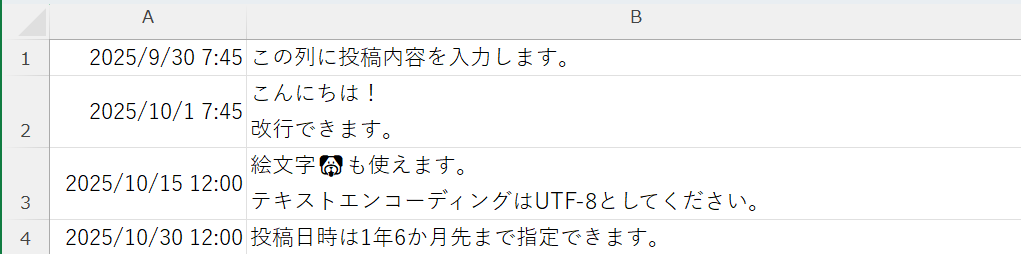
Create a CSV File for Text-Only Posts
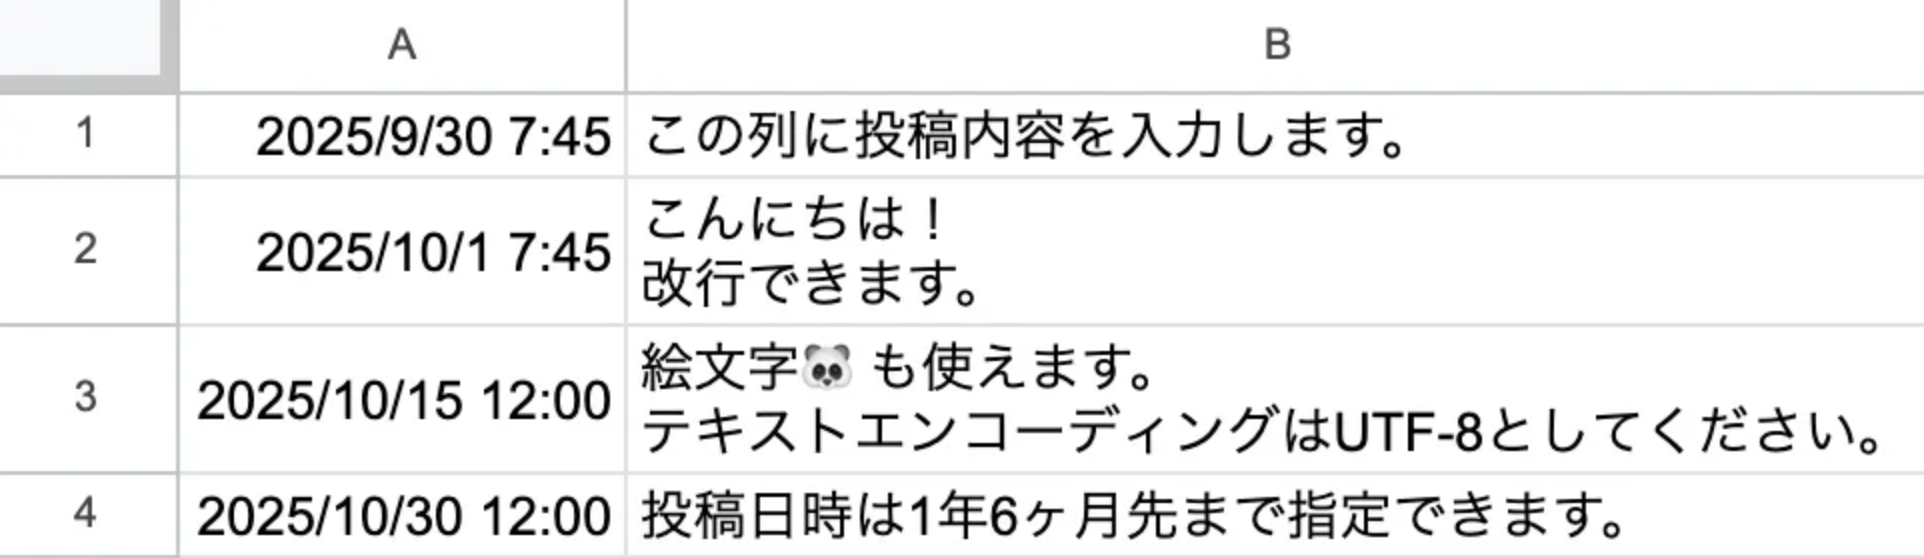
- Open the downloaded sample file in a spreadsheet application such as Excel, or create a new file by selecting [File] > [New].
- In column A, enter the desired post date and time in "YYYY/MM/DD HH:MM" format. You can specify a post date and time up to 1 year and 6 months in advance.
- In column B, enter the post content. Line breaks within cells will also be reflected in the post.
- Repeat steps 2 and 3 for the number of posts you wish to schedule.
- Export the CSV file by selecting [File] > [Save As].
- From [File type], select [CSV UTF-8 (Comma delimited)]. For details on how to save, please refer to How to Save as UTF-8 or Shift_JIS.
- Enter the file name and save.
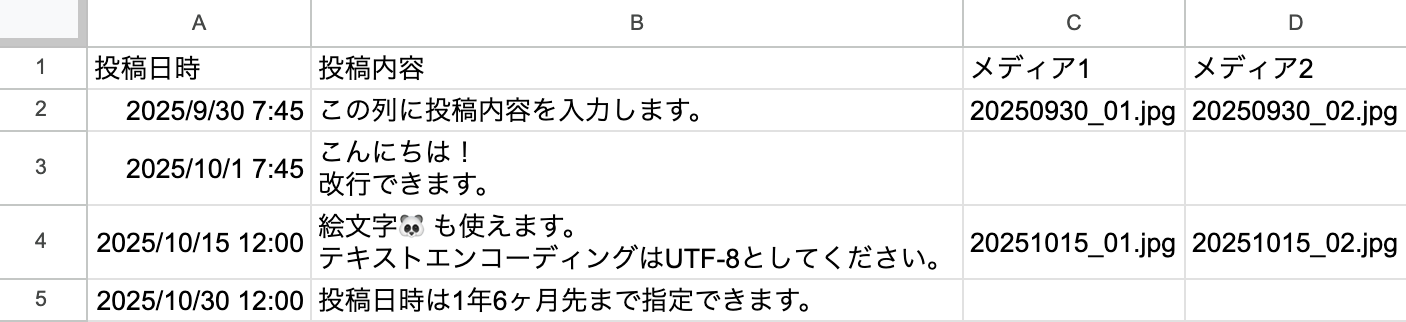
Create a CSV File for Bulk Importing Posts with Media
With a single CSV file, you can collectively add posts with media and text-only posts to scheduled posts or drafts.
To bulk import posts with media, you need to upload images and videos to the Media Library in advance. Please refer to How to Upload Media (Images and Videos) to the Media Library for upload instructions.
- Open the downloaded sample file in a spreadsheet application such as Excel, or create a new file by selecting [File] > [New].
- Create the CSV file according to the format described in Details of Input Fields below.
- Export the CSV file by selecting [File] > [Save As].
- From [File type], select [CSV UTF-8 (Comma delimited)]. For details on how to save, please refer to How to Save as UTF-8 or Shift_JIS.
- Enter the file name and save.
Details of Input Fields
| Field Name | Example Input | Required/Optional | Notes |
| Post Date and Time | 2025/08/21 10:00 | Required | Enter the date and time in "YYYY/MM/DD HH:MM" format. You can specify a post date and time up to 1 year and 6 months in advance. |
| Post Content | This is a sample post | Required | Line breaks within cells will also be reflected in the post. |
| Media 1 | 20250821_01.jpg | Optional | Enter the file name of the media uploaded to SocialDog's Media Library. Be sure to include the file extension (.jpg/.png) in the file name. |
| Media 2 | 20250821_02.jpg | Optional | You can specify up to 20 media files per post (up to 4 for X (Twitter), up to 10 for Instagram/Facebook). Please add as many media header rows as needed. |
| Media 3 | Optional | If left blank, the post will be text-only. | |
| Media 4 | 20250821_04.jpg | Optional | |
| Media 5 | 20250821_05.jpg | Optional | |
| Media 6 | 20250821_06.jpg | Optional | |
| Media 7 | 20250821_07.jpg | Optional | |
| Media 8 | 20250821_08.jpg | Optional | |
| Media 9 | 20250821_09.jpg | Optional | |
| Media 10 | 20250821_10.jpg | Optional |
For information on how to obtain media file names, please refer to How to Upload Media (Images and Videos) to the Media Library.
How to Set CSV File Dates to SocialDog Compatible Format
Perform the following operations to set the date format in the CSV file to a format compatible with SocialDog.
- Select the cell(s) whose date format you want to change, and click "Format Cells".
- Enter "yyyy/mm/dd hh:mm" in the Format field and click OK.
How to Save as UTF-8 or Shift_JIS
- Select [File] > [Export] > [Change File Type] > [CSV (Comma delimited)], and then click [Save As].
- If the file contains emojis, change [File type] to [CSV UTF-8 (Comma delimited) (*.csv)].
- Enter a desired file name and click [Save].
If the file contains emojis, select UTF-8.
About Line Breaks within Cells
When editing directly with a text editor, line breaks must be enclosed in double quotes (""). When editing with Excel, line breaks within cells are automatically converted during CSV export, so there is no need to enclose them in double quotes.
About Functions such as LEN Function
Functions are converted to text when exported to a CSV file.
The post content to be registered will be displayed on the confirmation screen after upload, so please be sure to verify it before registration.